Sunday, March 27, 2016

 Finally my English Squares top is finished. You would think squares are the easiest pattern you could ever get, but I had to constantly evaluate this and take out fabrics that I really wanted to use and add a whole lot more neutral and lights to get the effect I wanted. I had a couple of tries to get the border squares the right size and cutting the centre medallion was scary because I only had a very limited amount of fabric.

Some tops I struggle to finish and then want to bundle them into a cupboard and not look at for at least six months, but I've left this up on the design wall at the workshop.  I like looking at it so much, and  I get a thrill when I think "It's done! At last!"

So many different fabrics, and some of them were tiny scraps that I could only get a couple of squares from. They were precious, and it seemed right that they should end up here.
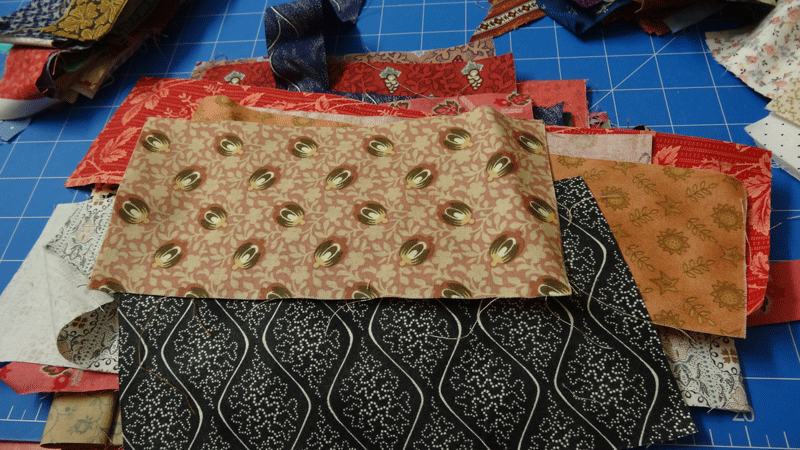
The centre fabric in this photo was from the backing of the second or third quilt that Keryn made, back in the early eighties. I only had a few scraps of this- no doubt donated in one of Keryn's clearouts, and this top was a good place to finally sew it up. There are fabrics in here ranging from the fifties to some I bought last month, an amazing variety.
I'd like to say that it used up all the tub of fabric that I was working from, but alas there still seems to be quite a lot left over. Plus I have stacks of 3 1/2" squares that I cut for the border, before realising that they were too big and overwhelming, and 3" pieces were the way to go. I'm currently piecing them together into strips to go on the back of this, so they won't be wasted.

I hope everyone is having a Happy Easter with family and friends.  Isobel is old enough to really enjoy it this year- she was happy enough to sit next to this big bunny but when he picked her up she gave him such a fishy look..."Who ARE you?" She's not going to be won over by eggs and trinkets...


Read more...

Tuesday, March 08, 2016

I've been a bit disappointed in my achievements so far in 2016- normally I have  a spate of finishing early in the year and it motivates me to keep on going. I've completed two tops so far, but that's not enough. I've decided that there are some projects that are weighing on my mind ( not to mention cluttering up my shelves) and are stopping progress on all my sewing, so the easiest thing would be to just deal with them. Once I'm no longer expending mental energy trying to work out where to go with these stalled ideas I'm sure I'll feel a lot more enthusiastic about everything.


The first one I decided to tackle was this  project from 2012. I call it English Squares, and it was based on some photos of an old quilt in a small museum. It was folded so I couldn't see the whole thing, and once I'd pieced hundreds of the squares I decided it was all too boring for words and put it away.

On one of it's trips to the design wall I thought it might be nice to have some sort of pieced focal point in the centre, or maybe some applique...but that  never happened and it all got packed away again. However I was looking through a tub of large floral fabrics and was struck by the colouring of this Mary Koval print from many years ago....hmmm, just the colours I was using in the English Squares.

So I began the brain hurty task of working out what size I wanted the panel to be in the centre, mostly decided by the fact that I only had 12" of this fabric. Then I had to choose what proportions to make the overall quilt; did I want it square or rectangular, with the panel set in the centre or slightly higher towards the pillow area, and what about the borders? If I have an antique quilt that I'm reproducing this process isn't so exhausting, but I had very little photo information to use as a jumping off point and it's quite hard to make all these decisions as you go.

I finally settled on a size and then a frame to go around it, with a 1/4" strip of warm brown right next to the print. Other people might just sew a little flange into the seam to provide that bit of colour, but I'm a longarmer, and I hate dealing with that little flap when it comes time to quilt.

All righty, now we're getting somewhere! I threw whatever pieced squares I had up on the design wall and then started sewing them into larger sections, but I can already see that I need to go back and make a heap more ninepatches before I can finish this.

Here's where I am now, that whole upper piece is joined together, and I'm trialing some bigger squares of the same fabrics for a  border. (The centre squares are 1 1/2" finished, the ones in the border are 2 1/2" finished ) The jury is out on whether that will be the way to go, but if I change my mind  then these strips will end up on the back of this quilt.

 These photos look as dull as ditchwater, but the fabrics are nice in person. I think this will be a quilt that is interesting to examine close up, but looks boring from across the room.

So it's still pretty boring sewing, but  I have a plan now. It's so hard to move forward without a sense of direction, but at least now the end is a little bit easier to visualise.

Read more...

Friday, February 26, 2016

 If I tried to cut all the scraps that I'm given in one session it really would take hours. Unless I'm in the mood for that I would rather do it bit by bit, so that tackling the pile doesn't become tedious.

Every time I turn the iron on I grab a little handful of scraps and press those before I do anything else. I have a tray in a bookshelf near the ironing board and I lay the bits out flat so they don't get wrinkled again.

After several bouts of pressing, when I have the time I start cutting these bits, using the ScrapSaver ruler for single triangles and the Easy Angle for any strips I've ironed. I use my 6 1/2" ruler for squares and bricks, and the 24" ruler for longer scraps.  Using the different rulers makes things a lot easier; I cut all the squares first, then bricks, then triangles so I'm not swapping from one ruler to another and back.

I also use a small mat that came with a magazine. When you are cutting small pieces like this you tend to cut in the same spot over and over  and the small mat saves your large cutting board. It's also easy to turn around if you're cutting multiple layers and don't want to disturb the pile. I also try to turn the scraps at different angles so I'm not always cutting parallel to the edge of the mat, again to avoid cutting over and over in the same spot.

Once everything has been reduced to neat piles of cut pieces I can file them into their containers and start ironing more scraps and storing them on the tray. It might take weeks for me to deal with the bits that Keryn gives me, but I don't get overwhelmed and sick of cutting if I do it like this.
 I love the sight of the neatly cut shapes, and it's satisfying to dump the trimmings into the rubbish container. Order is triumphing over the chaos of the scrap bin, slowly but surely!

Read more...

Monday, February 22, 2016

Keryn and I are both trying to clean up our sewing rooms and make sense of the stash. We have differing view points on how we use our fabric, and how we organise it, but that's ok. Each to his own. I'm still in love with scraps, Keryn less so.

She wants to get stuck into the yardage and cut up swathes of material; the gorgeous stuff that we've had squirreled away, sometimes for years. I always check the scrap drawers first to see what I can use there, then I start looking at the larger pieces. Keryn gets frustrated by the itty bitty nature of the scraps, I like to tame them by cutting them down to useful shapes.

We were going through some containers in her sewing room recently and she declared that she was sick of the sight of all these bits and said"You can have 'em all" No need to tell me twice! In fact one of the reasons I'm so keen to "help" her clean up is that I always come away with some goodies that she's sick of.


So what's the first step in taming this mess of bits? I like to go through the whole container and make some piles to start with. Scraps are overwhelming if you look at them en masse, so the trick is to start breaking them all down into manageable chunks.

I separate the pieces that I can usually just get one shape from, a square, a triangle, a brick. This takes a lot of the flotsam out of the equation, and things start looking more doable straight away.

If there are any pieced bits like this I put them aside. I can make four patches out of this lot, so they're already spoken for.


I put all the lights in one pile because I can usually cut them straight into shapes to be used immediately. I'm always piecing HST, so these can be cut with the Easy Angle or the Scrap Saver and go into the Leader ender container. I never seem to have enough lights ready to go, so this little pile is a welcome sight.

Then there are the strips of fabric that I have to cut with my long ruler, I straighten them up and then they can be filed in their respective drawers.

Finally there are the bigger hunks that have a few possibilities, I usually just iron them and sort them out according to colour. I don't want to cut larger bits down into one and a half inch squares and then realise I could have used the bigger piece for something.

If I do this  sorting as soon as I bring a bag of scraps home it doesn't get too overwhelming and I know immediately what I've been given. It can all go back into the same container, with sheets of paper separating the categories for the time being, then later I can tackle it bit by bit. In the next post I'll show you how I do that.

After some more tidying, guess what  Keryn gave me?.... back to the sorting!


Read more...

Sunday, February 14, 2016


My second finish for 2016 is Scrappy Mountain Majesties. Forgive the picture, I should have ironed the top before I took photos, but it was so hot in the workroom I didn't want to turn on the iron. I have the backing already chosen for this so when I've done a couple more customer quilts I want to get this quilted quickly.

I'm pleased that I didn't let these gifted fat quarters sit around in my stash. They've all been chopped up and the leftovers from this top are in the strip drawers. I probably should have used a darker blue for the borders, but I wanted this piece of fabric gone from the stash too, it's been hanging around for at least a decade.

This pattern is so simple and went together very quickly. I'll certainly keep it in mind for the next time I need a quilt in a hurry. And it seemed to make these old fabrics a lot prettier together than I expected.

This top used 6 metres of fabric, so I'm up to a total of 14m for the year. I really did think I'd have more projects finished by now, but it's been a very busy start to 2016.

Read more...

Tuesday, February 09, 2016


 Here's a customer quilt I did recently, a lovely William Morris pattern by Michelle Hill. The lady who stitched it is over eighty, and she does beautiful buttonhole applique by hand.

I have fun quilting these, but I don't think I'll ever sew one myself. I'm content to finish other peoples work;


I get the pleasure of playing with these designs, but don't have to put in all those painstaking hours of effort.


Read more...

Tuesday, February 02, 2016


We have a friend who is a dealer in all sorts of things, and if he ever comes across sewing related items he usually passes them on to us. Recently he gifted me a bundle of old fat quarters, many of them fabrics that I'd cleared out of my stash years ago. Obviously someone else had kept them in their collection for twenty odd years too. The material was good quality, so they were put away, perhaps for a scrappy backing.

When I looked at the pattern for Scrappy Mountain Majesties I realised that Bonnies large quilt was made in similar blues and greens, so I pulled the bundle out and decided to use them straight away and not let them sit around for another decade or so. I added a few fabrics from my stash, like the greens above and started cutting those 8 1/2" squares and slicing them in half.


I sewed all the triangles one night, then trimmed them the next day and cut them into strips. The pattern is so blindingly easy that pretty soon I had enough to make the lap size quilt, and now I'm debating on whether I want to cut more fabric and make it bigger.
Talk about easy, and you don't have to match anything up, which is a bonus.

I like the zigzag setting, but I'm going to play around with some of the other ideas in Bonnie's pattern to see what else I can come up with.


I thought the top would be pretty insipid and dull, but I'm really liking the overall effect.

I'm off to see if I can pull some more fabrics from the stash, and start cutting squares again.

Read more...

Friday, January 29, 2016

I was looking back through my blog and realised that I never took a photo of the  Ohio Star top that I finished last year. This isn't a great picture but you can see how the border turned out. (Excuse my dopey dog in the bottom of the frame) Once I'd figured out what to do in the borders it was a thoroughly enjoyable experience; in fact I could start making those little blocks all over again I loved them so much. I have no doubt there will be other Ohio Star quilts in my future.

I actually have about thirty blocks made for a green and cream quilt but that setting is a lot more complicated and I'm not looking forward to nutting out the final decisions for that one just yet.


 I've decided to make Bonnie's Scrappy Mountain Majesties, so I'm busy cutting and stitching that at the moment. It's not a pattern I'd planned to do, but it looks like fun, so why not?

Read more...

Sunday, January 17, 2016


 I'm really pleased with this finish. I loved making the blocks, working out the setting, sewing it together and making the borders look exactly as I saw them in my mind's eye.


 The only real problem I ran into was not having enough of the sashing fabric, which stumped me for quite a while. I only possessed  half a metre to start with, (of course bought years and years ago) then Keryn found another half metre and after much searching I discovered two other fabrics that I could place in a way that balanced the setting. I don't usually bother so much but I wanted this top not to have any jarring irregularities if I could help it.

Sometimes it would be helpful to make a top with newish fabric that is still available somewhere in the known world, instead of scratching through piles of twenty year old stuff that you hope is still in your sister's stash as well. But that seems to be the way we operate sometimes.

Read more...

Saturday, January 16, 2016

 My first finish for 2016 is the nine patch on point blocks, and I'm so pleased to have this done. I didn't spend ages agonising over the border fabric, which is somewhat unusual for me. I chose the floral as I was making the blocks and the others occurred to me soon after- I love making definite decisions and not dithering around  unable to make up my mind. This is such an unusual state of affairs that  I actually found myself thinking "Perhaps I should just try some other fabrics...." but I managed to ignore that piece of insanity.


I cut the plaid border along the actual printed lines, which took some time as it was a little bit crooked, and then carefully matched the print when I joined the strips. This  wasted some fabric in between the repeats, but I really wanted to have this effect around the main part of the top.


When I was pressing the dark brown print I realised that it too had a zigzag motif in the background- I hadn't even noticed it until then.

Unfortunately I haven't got a photo of it hanging up yet, I plan to go to the hall later on and I'll see if I can get a decent shot then. The top has grown to be quite large and won't fit on my design wall here.


Now I can sort out all the bits and pieces left over from this project, clear the tables, and on to the next finish!


Read more...

Thursday, January 07, 2016


 Years ago I started making 3" finished nine patches, and amassed hundreds of them because they were so addictive I couldn't seem to stop. I sewed them in sets of four or five, thinking I could make another double nine patch, but while I was going through my folder of ideas I came across this configuration.

I'd had in mind the colour scheme of this antique quilt anyway, so I used those colours to make the nine patch blocks.( But I still want to reproduce this old quilt, how many can I make?)


I happily sewed a pile of blocks, but one thing and another got in the way, and soon they were relegated to the background, even though I loved them.

Late last year I pulled them out and decided to move them further along, but how to set them ? I didn't mind them straight,


but I do love on point settings. Add some more nine patches in the corner posts...I like it even more!


I've finished setting them together and have the borders chosen, so I should have a finished top soon. It's so exciting when a long term project nears completion, these blocks have sat around for nearly five years and it will be great to see that project box empty.


Read more...

Monday, January 04, 2016

I seem to have acquired a small stash of bright fabric, most of it given to me in various scrap bags over the years, or offcuts from customer backings. I never buy this type of material, it's just not my thing, but nevertheless, I have to find some ways to use it up. It's not that I don't admire all the lovely bright designs I see, but if I have a limited budget for my fabric I won't buy anything I don't really want in the stash.


When I was making Broken Dishes blocks last year I thought I might make some bright 3" HST,
and then  like Lori in this post, I stumbled on the same  photo, from  http://craizeecorner.blogspot.com/p/2012-quilts-finished.html

 Yep, this quilt looked pretty good, so that became my plan. I haven't got much further than making a heap of blocks, but I hope to have this done soon as the first top of 2016.

Is it strange to be amused by the dog ears  cut off the triangles, sitting  in my tin and looking cheerful? Normally it's full of duller reproductions that are quite drab by comparison with these little sparkly bits. It's been fun to work with these colours and it hasn't used up all of them- I think there may be a few more little tops lurking in my future.


Read more...

Saturday, January 02, 2016

The end of 2015 was exhausting and it's taken me until now to feel faintly normal again. There seemed to be a lot more hustle and bustle this year, and unfortunately some of it wasn't very enjoyable.

Totally wonderful though, was a trip to welcome the latest grandson, Edmund Duncan, born on 17th Dec. He's a beautiful boy and because the family left on an interstate holiday about four days after he was born I've only seen photos of him since then. When they get back I plan to spend more time with this little chap, and his proud big brothers.

Apparently they thought of calling him Ted as a nickname, but he's quickly become Eddy- I think that's pretty cute!

I've been  sewing despite  the kerfuffle that was Christmas, so I have a few projects to show you when I get my photos sorted out. I hope everyone has a great 2016, and I'm ready to get down to some serious piecing in the coming weeks. I love January in the sewing room with the AC on!


Read more...

About This Blog

Lorem Ipsum

  © Blogger templates Newspaper III by Ourblogtemplates.com 2008

Back to TOP