I only have a few photos of my son John's wedding to Liz, because I made a concious decision to put the camera down and just enjoy the experience first hand. Sometimes we spend so much time looking through the lens of the camera trying to capture the moment that we don't get to experience it fully. There were plenty of other people taking photos so I'll be able to enjoy those later on. It was so lovely having all the family there (well most of them) and helping to launch John and Liz into their married life- I had a wonderful day and know they did too.
Wednesday, October 31, 2012
I only have a few photos of my son John's wedding to Liz, because I made a concious decision to put the camera down and just enjoy the experience first hand. Sometimes we spend so much time looking through the lens of the camera trying to capture the moment that we don't get to experience it fully. There were plenty of other people taking photos so I'll be able to enjoy those later on. It was so lovely having all the family there (well most of them) and helping to launch John and Liz into their married life- I had a wonderful day and know they did too.
Saturday, October 06, 2012
Oh my goodness, where was I? We've been racing around for weeks printing and packing orders and finally it's all over and done with and life can go back to what passes as normal. I feel so discombobulated though, it's hard to pick up the threads again.
The machine quilting conference was great, lots of people to catch up with and all the excitement of a big event like that. We finished putting up our booth and I stepped back to take a photo- the batteries in my camera were dead. No worries, I'd bought the charger, so I put it on overnight, went to take a photo next morning and the batteries were still dead. So no photos and I need a new charger.
I caught up with some blog readers, and Tazzie came by and said hello- at least I could recognise her, having met in real life before. It was lovely to see her again, and to talk with some faithful readers who keep hoping we'll go back to more regular posts.
I had been working on Bonnie's Pineapple Blossom blocks and I managed to sew them together before I got too busy. I did like them set straight together like this...
I still haven't worked out a border for it, and how to use the HST that resulted from making the blocks, but I'm thinking on it. I might piece them into the backing or sew some smaller blocks or spread them out in the borders.
But the garden is calling at the moment; we've had a few hot days and it's a reminder that summer is coming and the plants need to be repotted or put into beds with soaker hoses and mulch to protect them. Our season of Spring lasts about two weeks, so there's a sense of urgency for me. Those dreadful hot days with horrible north winds will soon be here and I want to get ready for them. For now the weather is being kind, and I do love puddling around with pots and dirt and watching the buds on all the flowers get bigger every day. And my new roses are going to bloom soon, I can hardly wait to see what they're like.
Read more...
Sunday, September 09, 2012
These were fertilised and grew much larger this year than when they were in the garden. When they die down I'll split them up and store them, they are so crowded in this pot there isn't room for any more. Their spotted leaves are quite handsome too.
I have some red ones from my MIL's garden, but they aren't as prolific and easy to grow. I've never seen them available in shops- I think they must be an old type and not as popular as some of the more flashy bulbs. I'll continue to spread them through the flower beds, but I'm not going to dig them up every year as Mum did. They seem to fend for themselves if left in situ, and it's one less gardening job for me.
It's been very spring-like here, and I had a sudden mad urge to stop sewing the brown brown brown Duck's Foot blocks I've been making and delve into my pastel fabrics.
It wasn't until I viewed the photos that I realised this must be a reaction to the change of the season, all those pretty blossomy, flowery shades together.
I chose a pretty turquoise for the main colour, and cut up a heap of strips and squares for Bonnie's Pineapple Blossom block.
I've made the centres for twelve blocks to see if I like the process, and to use the smaller pieces from the scrap drawers. Next I'll have to cut strips to get some longer lengths, and cut a heap more of the background squares. I'm having so much fun I don't think I'll stop at twelve though, these colours are making me very happy.....
Sunday, September 02, 2012
Keryn has a tutorial on how we do mitred corners here. I will say that I hand tack the fold in place without moving it from the ironing board instead of sewing it at the machine.( I slip a small cutting mat underneath so the pins and the needle don't catch the ironing board cover) And I will change thread colours as I applique this seam down, I'm a bit picky about things like that. I love this method of doing mitres, I've never had one that didn't work out perfectly.
Oh dear, Spring Fever has struck and I'm elbow deep in potting mix and seed sowing and garden clearing. I have a happy knack of being able to ignore the weeds and mess in the garden and just concentrate on the flowers, the colours, the joy of seeing things grow. I don't have time to maintain a spick and span garden, so I just enjoy what I've got.
But I think I might have gone a bit overboard on the roses this year. My brother dug up all his old ones and I rescued five of them and then I bought about ten new ones over the last two months. I'm crazy, but I can't seem to resist them. Now they're all shooting happily and a few have little buds appearing- I can hardly wait until the new ones flower and I can see whether they are as beautiful as the labels say.
When I'm watering this many pots in January I won't be quite so delirious, but that's months away.... Read more...
Wednesday, August 22, 2012
I've lost the photo of the antique quilt I based them on, and couldn't remember what the border looked like.
I tried a sort of sq on point border, but it didn't do anything for me, and the top has been sitting on the design wall while I tried out different combinations. I think I've finally decided what to do, and I'll start sewing strips tonight with any luck. Stay tuned...
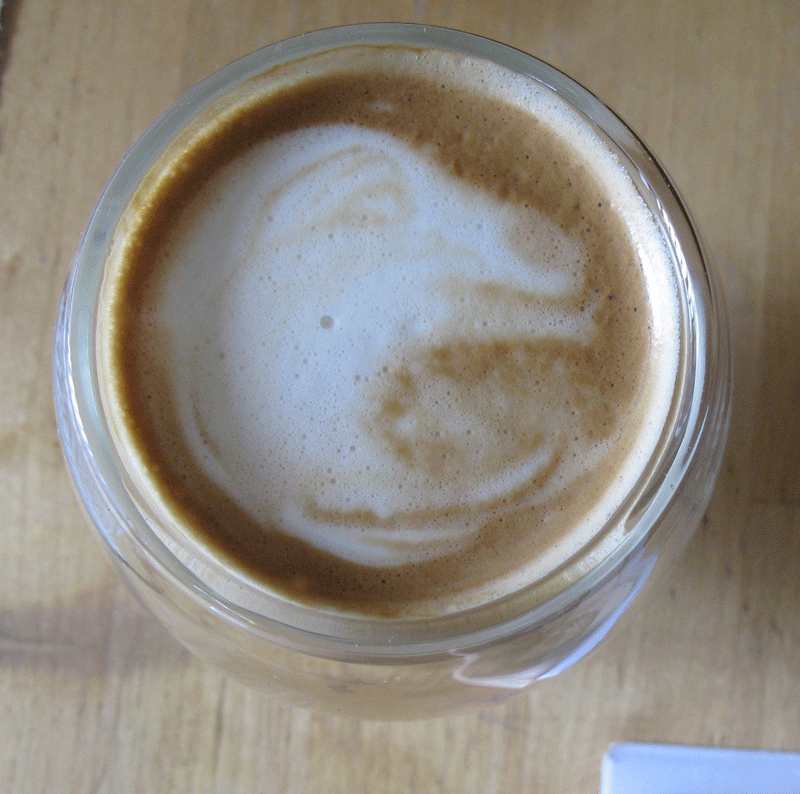
The other night at John's place he was making us a cup of 'proper' coffee, and when he put the cups on the table we discovered... a line drawing of a bottom
and a sort of mythical creature. He swore he did nothing to make these happen- must be his artistic talent coming out in strange ways.
Read more...
Saturday, August 11, 2012
I ended up making it 7 x 8 blocks, and then I found a stash of 9 1/2" squares that I cut in half and used as an edge. I really liked the border in Bonnies book, but I'll only go so far for Pippi, much as I love her. If I'm going to put that much sewing into a border, it's not going to be a dog bed!
I thought using the cut down squares for the border was really nifty, because I didn't have to measure anything, just count the corresponding blocks, and I put a square in each corner to even things out. I didn't have to bother finding yardage big enough for the whole thing and the scrappiness suited this particular top. It's an idea I'll definitely use again.
I used a new panto of Keryn's to test it out and it made a lovely texture over all the scrappy bits and pieces. I sewed three or four old bits of fabric together for the back- no photo- and got rid of about ten pieces of scrap batting from the workshop. I could probably still make four quilts from the pile of batting offcuts, but at least it's a start. All in all, I used a shedload of scraps of every kind, blocks, strips, backing squares, yardage and batting. Very satisfying.Thanks Pippi! Read more...
Wednesday, July 25, 2012
I've been using my 4-4 Time quilt on my bed, but it's showing some wear because Pippi sleeps at the bottom of the bed. She has her own purple quilt, but she spends a bit of time every night scratching around getting herself in juuust the right position before she settles down and I decided I needed another quilt to share the wear and tear. Preferably one that had minimal light fabric in it.
Surprisingly nothing already made seemed to fit that bill, so I had a quick scrounge around in my scrap bins and orphan units and made a start on Bonnie's Bargain Basement pattern, from 'Scraps and Shirttails'. I'd been thinking about this design, all I needed was an excuse to start!
It was blindingly quick, because I had a large amount of 3 1/2" strips and some squ in sq units as well as 4 patches in the right size.
I tried this on the bed, but I want it larger all round, so I'm pulling more medium and dark strips out to play with.
It's been terrific fun, and there really is no right or wrong way to lay the blocks out, which I love. I may even make a pastel one to use up all the lighter strips I couldn't put in this.
So it's Pippi's fault I've made another top, and if this one wears out I'll just make another.
This little face is worth it.
Read more...
Wednesday, July 11, 2012
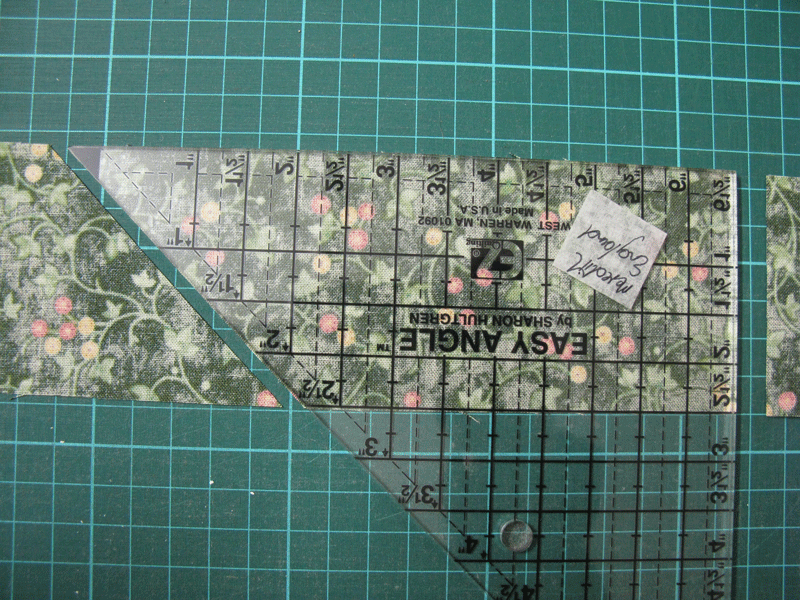
These shapes are easy to cut with the Easy Angle ruler. Just square up the end of the strip and then align the bottom edge of the ruler on the strip and cut along the sloping edge.
Rotate the ruler and line the long edge with the top of the strip, and the sloping edge where you made the first cut. Trim at the side, and there you have two identical shapes, each sloping the right way. Do not flip the ruler over, just rotate it into place.
You can make these blocks sloping two ways and both are right, as long as you are consistent in the way you lay out the strips. Either have the strips ALL wrong side facing up, or wrong side facing down. As long as they are facing the same way, they will join up. I lay a finished block on the cutting mat to make sure I was doing it right.
I cut the dark pieces wrong side up,
and also the light pieces.
However the triangles that go on the end of these strips I cut right side up, for the simple reason that then I could line up the points easily.
You can see here that I cut a strip that was folded in half .(I used the Easy Angle for these too)
The piece that faced up will fit perfectly on the larger piece,
but the piece that faced down has to be lined up with the top and sloping edge (no nice little point to match here) which seems more fiddly. Not wrong, as I can use both pieces, but if I can remember to cut them facing up I like it better. It's certainly easier to keep both pieces exactly aligned as you begin sewing, so to me it's worth it.
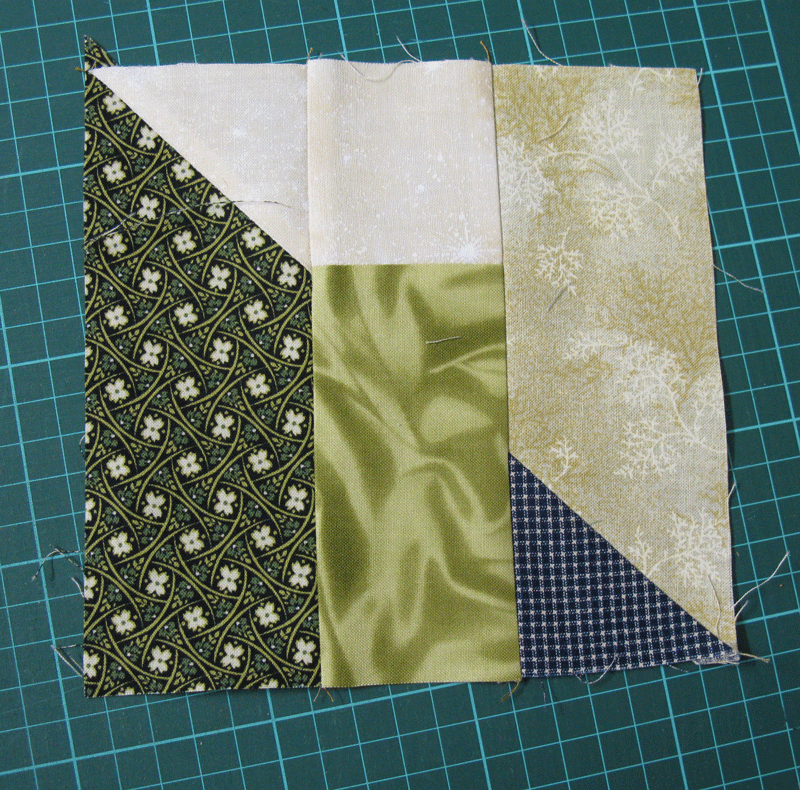
For each block you need the dark strip with a light triangle at the end, a 4 1/2" dark/medium strip with a 2 1/2" square sewn on to one end and a light strip with a dark triangle at the end.
Pretty easy if you've got them all sloping the right way.
When I press the strips I make the seam allowances go towards the small triangle. I don't care about pressing towards the dark fabric because I'd rather the seams nest at that point when the blocks are joined together.
Each block measures 6 1/2" unfinished and four of them together are 12 1/2" unfinished.
Now you just have to make dozens and dozens of these and play with the layout, they really are so easy to sew it's hard to stop. Read more...
Sunday, July 08, 2012
I was testing her instructions and decided to set my blocks together in groups of four which is a more recognisable split nine patch.

I loved making these, and they used up a power of scraps from the 2 1/2" strip bin. The resulting quilt was donated to the bushfire cause, and I've been meaning to make another one to use up more strips.
However I began playing around to see if I could simplify the block even further, and came up with this.
I started off making the pointed ends using 2 1/2" squares, flippy corner style but I quickly tired of that. I admit flippy corners have their place, but I can't throw away the cut-off bits and I have buckets of them already, so I don't need more.
I found a way to use the Easy Angle to cut this block, and I'll post some photos tomorrow. Even though this started out as a quick scrap quilt, I've also been playing with settings for the blocks.
They can be used in any configuration that the log cabin uses, and I think I'll have to make a heap more to try them all out. I'm so easily sidetracked it's not funny....
Read more...