

 When I decided to use my strings I looked through my photos and found this one. I can't remember if it was from ebay, or a blog, but I was immediately intrigued with the possibilities. I decided to make it from the "strata" I was constructing , sewing the strings into larger pieces of fabric.
 This maker has thrown in some crumb type piecing as well, but I didn't want to confuse myself too much.
 I began by cutting the strata into strips, in this case 4 1/2" wide. I just cut until I couldn't get anymore, and then set aside whatever was left. It helps to make several different strata pieces before making the blocks, and then you run less chance of having the same fabric combinations show up together.
 I tidied up the ends of the strips so that they were straight- this meant I could sew them together to make longer strips as needed.
 I had a selection of 4 1/2" squares already cut, and I sewed one to a strip; in this case I jogged the ends a bit so the seams wouldn't fall where I wanted to trim them up square.
 The smaller cut-off pieces can be sewn together to make more strips; this is useful at the start when you only need the piece to measure about 5" anyway.
 Sew another strip onto the other side to make the centre of the block and trim. It will be 12 1/2" by 4 1/2".
 I made several at once to simplify the process.
 Then you can add a longer strip across the top and bottom, trim and square it up, and that's it. You can move the strips along to make sure fabrics aren't repeated top and bottom, and flip them around to distribute lights and darks in a pleasing arrangement.
 The leftover bits can be sewn together for more blocks and to add more variety, turned into a strippy border or just go back into the string box as 'seed' material for the next top.
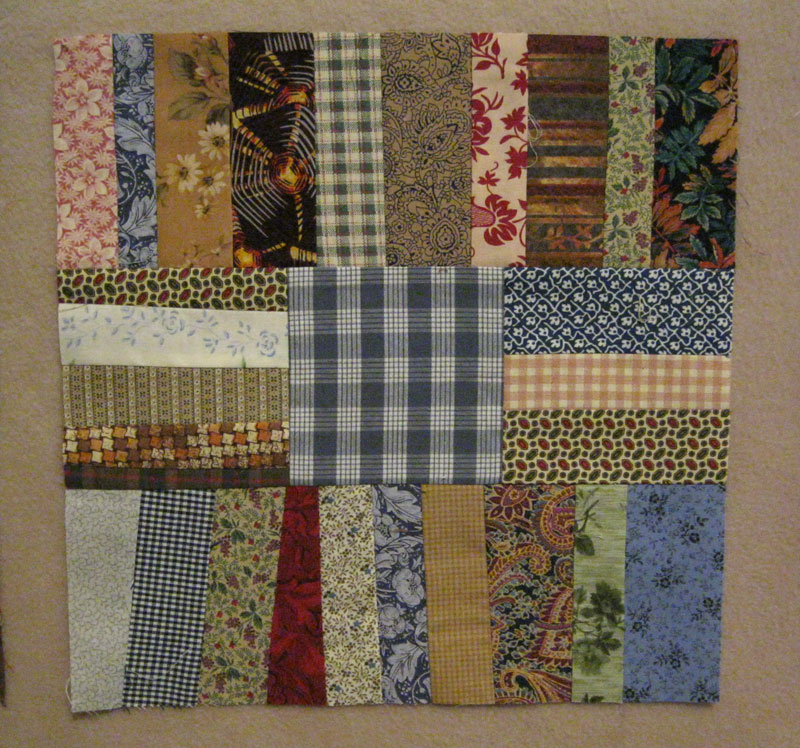 I enjoyed making these and once the strings are sewn into one piece they're really simple to put together. I'd like to try and make them more wonky and perhaps put some crumbs and tiny bits in there too. I'll definitely go back to this method, but I've made twelve so far and the strings have run out. I'm too impatient to wait for more to build up, so I'll probably set these as soon as I get the time. I don't think I'll use the strip around the outside of the block, as the original quilter did, but you'll have to wait and see.
Keryn was looking at some blogs the other day and said "Oh look, there's your block". She was reading The Root Connection and Sujata has a beautifully pieced block as her profile picture. It's much more vivid and contemporary than mine, and dare I say made out of nicer fabric than the old scruffy stuff I used, but the method is the same. And I pinched it from the older quilt, it's amazing how these things go round and round.
Wednesday, March 16, 2011
Subscribe to:
Post Comments (Atom)


4 comments:
Thanks for the tutorial! I have oh, so many strings leftover from my Spiderweb quilt, and this would be a great way to use some up.
love that quilt of Sujata's and yours too!
nice to see the same quilt in two different fabrics styles. would love to start collecting solids, I have a few amish quilts I would love to make as well as would love to have one of my own inspired by Sujata's quilt
Kathie
Sort of like the Gee's Bend quilts.
Post a Comment